Your browser was unable to load all of the resources. They may have been blocked by your firewall, proxy or browser configuration.
Press Ctrl+F5 or Ctrl+Shift+R to have your browser try again.

Thread for my new skin w/ tiles (and maybe other stuff) #14

@CTVCAM8

Hope I don't bother you with these mentions. I'm doing a tiled interface for my skin, and this seems to be the best way to achieve what I'm looking for. I made this post in case I have any more questions later on, but for now I just have one.
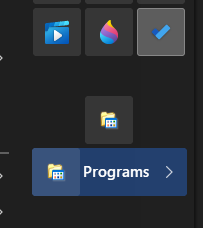
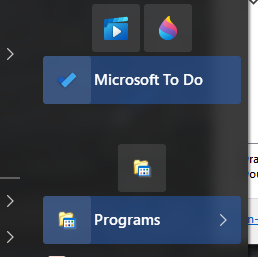
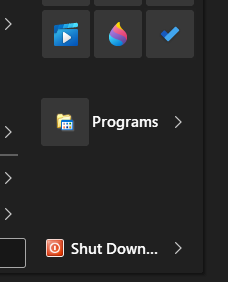
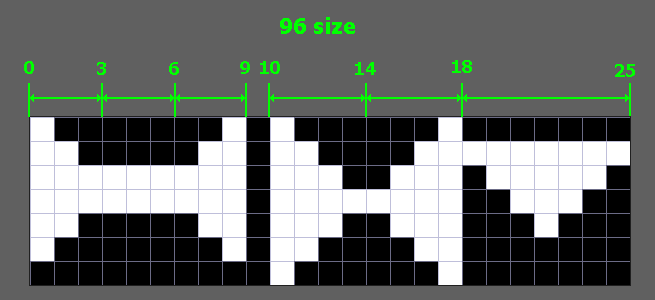
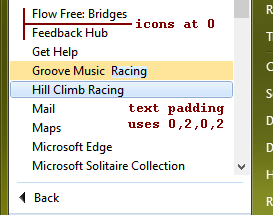
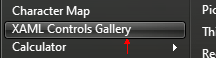
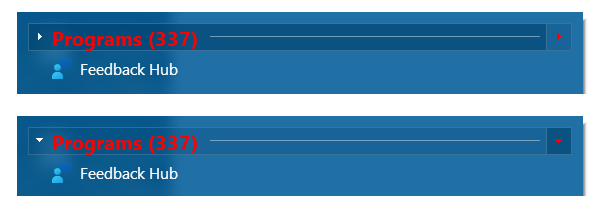
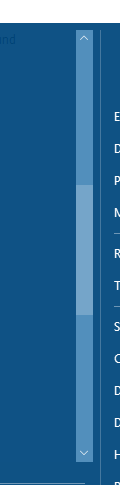
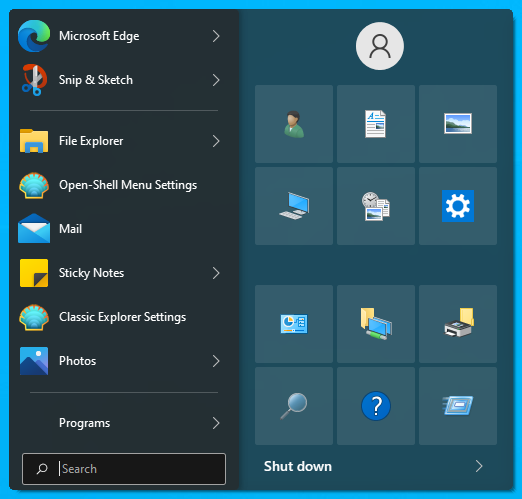
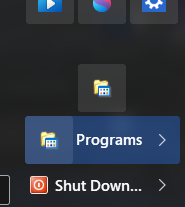
I found something interesting with these tiles' "new" selections. For some reason, when I specify the main2_new_selection_mask, these tiles don't seem to follow that rule. Instead, it seems to make a weird combination of the icon frame and the selection:
Screenshot 2020-11-06 221826.png
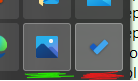
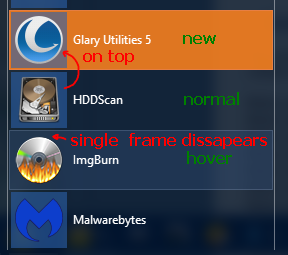
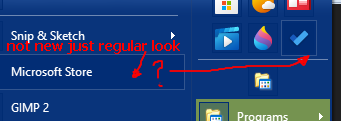
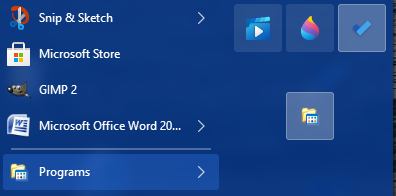
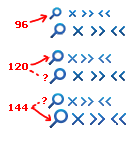
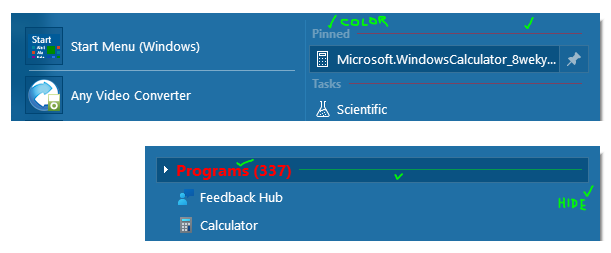
Green is the original selection, red is the "new" selection.
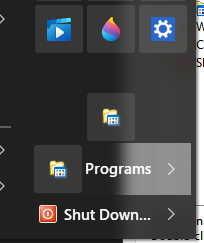
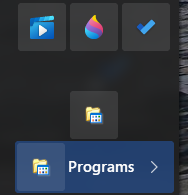
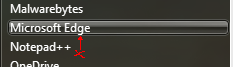
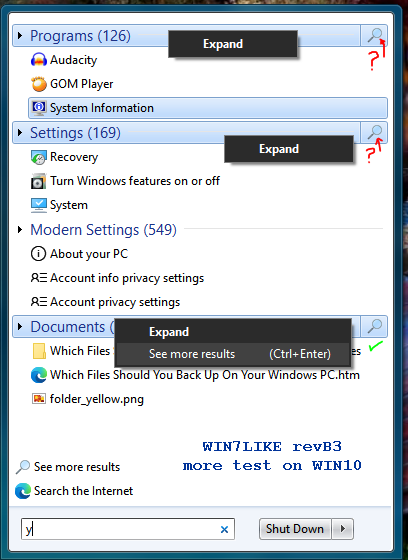
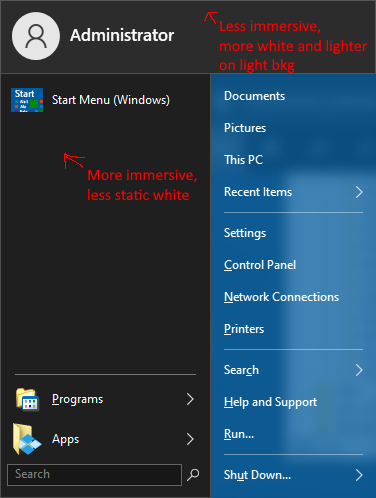
In fact, I looked at your "Win10 Concept" menu and found a similar issue. I don't believe that one uses frames though, so the intensity doesn't get compounded the same way.
I might be having a brain fart, but I can't seem to alter that selection without changing the standard selection. My goal for now is to completely disable the new selection, if that helps at all.
Thanks

  • replies 69
  • views 11.4K
  • likes 7

@bonzibudd
I think for my experimental skin, I just reinitialized Main2_new_selection to "0", so it will just show a copy of the default main2 selector as a new program.
I turned off icon frames on 2nd column.

I can't remember if at some point I tried icon frames as the selector or not on that skin.

I have yet to look at your new skin.
Are you saying you are using the technique where the icon frame image is a horizontal image with normal/hover sections?

Edit not vertical. Should be horizontal like this image from Ivo's Viva Metro skin
icon_frame.png

Correction

I've used that in some skins, but it made some issue where the new program selector gets cut off on the left.
If you are using that way, I wonder what would happen if instead of Main2_new_selection_mask, use instead "Main2_new_icon_frame_mask"
Never tried it.

If you are not using the above technique, and do not want it to show, then just make an invisible Main2_new_selection_mask.

bonzibudd · Author
#3

I think my skin is different in this regard, since mine uses the icon frames for the tiles themselves. It's basically just a square bitmap with vertical and horizontal offset, and the selection has been altered to account for the offset. The problem is that I can't seem to change the main2_new_selection, it just seems to use the standard main2 selection instead.
This would probably be better explained if you saw the skin itself, so I uploaded it here. As for the icon_frame_mask, I tried it with seemingly no success.

#4

@bonzibudd
I don't see anything wrong with your slightly brighter new selection picture.
What look were you originally trying to achieve with the new selector?

From what I know looking at this picture of someone's menu, the icon frame shows as a layer on top of the new program selector.
If it had a two-section icon frame image, it would be visibly on top of the hover selector as well.

Shows icon frame on top of new selector.png

I tried Main2_new_icon_frame_mask on different skin and put "new" in different places, and got nothing as well.
I looked in the skin manager file and didn't see it defined. Oh well.

I have downloaded your tile skin and XML file.
Will look at it sometime tomorrow.

#5

Hi @bonzibudd

I don't get what you got in your picture. I get no new anything showing.
I thought it was because you had changed the text from my bad suggestion:

Main2_new_icon_frame_selection_mask=19
Main2_new_icon_frame_selection_slices_X=3,2,3
Main2_new_icon_frame_selection_slices_Y=3,2,3

So I made a new selector bitmap to match regular selector size,
and I changed back to this text:

Main2_new_selection_mask=37
Main2_new_selection_slices_X=6,2,6
Main2_new_selection_slices_Y=6,2,6

At first, I used the Programs command but gave up on that
and used C:\Users\my name\AppData\Roaming\Microsoft\Windows\Start Menu\Programs
so a new selector will show a longer time.

<img src='https://gitq.com/files/raw/299ffadf01f9efb68ee7b9ff0f84e707b10169b4.png' alt='button doesn't show new.png' width=185 />

You can see the blue new selector shows when it's a normal selector,
but will not show if changed to a button.

If I put this in:

;Main2_new_selection_mask=37
;Main2_new_selection_slices_X=6,2,6
;Main2_new_selection_slices_Y=6,2,6

Main2_new_selection=0
Main2_new_selection_mask=0

I get this

um what.png

Ain't that puzzling It looks like what happens when a 24-bit bitmap selector is used instead of a 32-bit (with alpha channel),
where the desktop shows through more.

What version of your skin makes a new app or new program button appear like in your picture?

bonzibudd · Author
#6

Very weird. In my case, the new selector does appear for both "tile" and text items, but only one of them uses the correct one:
Untitled.png
Maybe something is wrong with the file I uploaded, but I'm really not sure. At any rate though, the only explanation I have for this would be that the tiles are technically sub-items, so they might need a different line of text to specify the new selection. I wonder if there's a special identifier for those button items?

#7

Your skin works better for sure.
It may do the same on this one, but I dont have that link for that Microtodo app/program.
Am I wrong to think that there will be very few of those links that have anything new anyway?
I'm still using OSM 4.4.157

Ok, the reason why the new selector showed what's behind the menu was because
Main2_new_selection=$SystemAccent|$StartBackground
was still active in the file.
It defaulted to a 24-bit bitmap. I changed to an orange color to confirm it.

Still, I can't get any combination of text to show a new selector on a button.

So it looks like I made a lot of assumptions that are wrong about the 2nd column.
Sorry about that.

#8

I went back to your unmodified skin where it uses:
Main2_new_icon_frame_selection=$SystemAccent|$StartBackground
Main2_new_icon_frame_selection_tint1=$SystemAccent
Main2_new_icon_frame_selection_mask=19
Main2_new_icon_frame_selection_slices_X=3,2,3
Main2_new_icon_frame_selection_slices_Y=3,2,3

not the mod which uses:
Main2_new_selection=$SystemAccent|$StartBackground
Main2_new_selection_tint1=$SystemAccent
Main2_new_selection_mask=37
Main2_new_selection_slices_X=6,2,6
Main2_new_selection_slices_Y=6,2,6

Correction
The program folder link does work as a non-button type but not a button.
Why the combination of Main2_new_icon_frame and selection works, I don't know.

Next
I installed Microsoft To Do app and did not launch it.
It never saw it highlighted itself on the left main menu App shortcut or app submenu.
I then made a button link with shell:AppsFolder\Microsoft.Todos_8wekyb3d8bbwe!App

This is what it looked like

Original skin.png

Then by the time, I switched to the modded menu with the matching new selector size,
the MicroToDo button lit up like yours as this

Modded skin.png

I then switched the MicroToDo button to a regular selector

mod skin normal selector.png

I have no idea why the button works that way.
I'm blaming this unknown due to my sugar induced brain fog from eating way too much leftover Halloween candy!

#9

I switched to the Metro skin.
It sure looks like the button is borrowed from the main selector and mixing together with the icon frame.

Metro skin.png
#10

I went back to using the program's command and upgraded some program software.
Did not hover over the menu to make sure anything "New" did not turn off.
It displays like this on both original and modded skins.
I still don't see anything wrong with it being that way.
It looks ok on dark/light/colored menus.

Used program command.png
bonzibudd · Author
#11

Ok, thanks a lot for the input.
I guess there's just a weird thing with the buttons specifically. You're right, also, that these probably won't have too many "new" shortcuts. I'll probably keep the right-hand icons somewhat default (the ones that work) and let the user decide for the most part. Luckily this isn't a very big problem, and it is still usable/readable from what I can tell.
I think I've gotten too picky for my own good :)

bonzibudd · Author
#12

I'll post something else here if I find any other roadblocks. But it seems to be been going pretty smoothly so far.

One last thing.
Anyway, there is still a way to stop at least the brighter 2nd column selector it uses for the new button.
Just make 2nd column selector transparent 1/255 alpha.
Then make the icon frame image do the work of the selector by using a 2 section type. So instead of 8x8 size make it 16Wx8H.
The left side has your original image, with the right side with the look of your original selector with the border.

2sectionmain2 frame.png

Just use the same icon frame text.
It has nothing to do with Main2_split_icon_frame that is used for the shutdown button.

It works. The only problem is if someone turns off the button feature,
then it looks terrible as the selector will be invisible along with an icon frame on the left. :(

The problem.png

I don't have any good solutions for you. Good night.

#14

Hey @bonzibudd
Came back again. Just want to say you've taken the bigger search box area further than anyone else.
It's a lot of work making all the different bitmaps for all the ways the options interact.
A user will only see two different search boxes.
Only the skinners know there's a lot more to it. :)

Double goodnight.

bonzibudd · Author
#15

Ok, I tried the icon frame selection, and it seems to work well! I think I will go with that, since it's not much worse looking than the previous one. It's also better since I won't need to make new selection slices for each DPI, when I get to that point.
Thanks for the help.

#16

@bonzibudd
Speaking of HiDPI
I wanted to see what would happen if I put

[EXPERIMENTAL_SEARCH AND SEARCHBOX]
Main_bitmap_slices_Y=13,1,1,29,1,30

to hopefully make your search part of the Main bitmap enlarge for large font and higher dpi.

No luck. It's as though it only used the normal first three slices amount, then cut off the rest of the menu.
Maybe the extra vertical slices are only for 7 style like in Metro.skin7.
I think Ivo used it there to fix the jump view when search is turned off.
We don't know if it's assigned to the Classic 2 style.

Still, it makes me wonder about other extra slices in bitmaps when I look at SkinManager.h file
and find not only 6 slices for vertical, but even the horizontal can have up to 9 slices!
Looks like Ivo put in a lot of potential in there but no notes on the website for skinners.

// MENU SECTION - describes the menu portion of the main menu
MenuBitmap Main_bitmap;
int Main_bitmap_slices_X[9];
int Main_bitmap_slices_Y[6];
TOpacity Main_opacity;
TOpacity Main2_opacity;
TOpacity Search_opacity;
TOpacity Jumplist_opacity;
TShadow Main_shadow;
MenuBitmap Main_bitmap_search;
int Main_bitmap_search_slices_X[9];
int Main_bitmap_search_slices_Y[6];
MenuBitmap Main_bitmap_jump;
int Main_bitmap_jump_slices_X[9];
int Main_bitmap_jump_slices_Y[6];

bonzibudd · Author
#17

Just a thought, but maybe the extra horizontal could be for a caption in the Classic2 style? Unless it has already been tested of course. Then again, I'm not sure how the program could determine which group would go to each item.

#18

Caption is only available on single column menu:

Guessing the determination would have to be in code in other files that tell it how to use the slices for different menu arrangements, or it could refer to Windows code?.
It's possible Ivo put the extra slices for future development, like the extra slices in the submenu as well:

MenuBitmap Submenu_bitmap;
int Submenu_bitmap_slices_X[6];
int Submenu_bitmap_slices_Y[3];

Maybe the extra slices could be to make the icon bar as in Win98 menu, then found out icon frames can be used instead by changing the offset to get a similar result. Who knows what Ivo had planned before he got tired of Win10 breaking his code.

bonzibudd · Author
#19

Continuing the topic of DPI, I have a question about scale factors: If I used a scale factor with a decimal, for example 35.7, do you know if Open-Shell will recognize the decimal? I'm currently trying to replace the custom paddings at different DPIs with scaled versions, which should hopefully reduce the jank-ness and make it easier to add more options later on. Decimals would make it more accurate, but even if I can't use them I can probably work around it.

#20

Not that I'm aware of if it's the Override system DPI: settings

If it's paddings for text, icons, arrows, and menu paddings, etc,
never tried it.
I just skip the % and put the exact pixels in for accuracy.

bonzibudd · Author
#21

Got it. I ended up going with this:

Main_padding=14,14,5,14,36%,36%,100%,36%

If my math is correct, this should be the same as how I did it before, at least for all reasonable DPI settings. And it looks like OSM does round up and down correctly, so hopefully it's accurate enough.

#22

I guess it all depends on the floating sides.
If you have an extra bitmap for higher dpi that has more invisible parts,
it may not track correctly unless you've included that into account.

I'm glad we are not using Gitter for this.
By the time it's done this thread could be the length of a small book.

bonzibudd · Author
#23

I guess it all depends on the floating sides.

Very true. For now, the extra space on the outside is the same for all DPIs, so everything should be relatively linear. But I'll probably have to consider that if I change it in the future.

By the time it's done this thread could be the length of a small book.

My thoughts exactly.

bonzibudd · Author
#24

I have a question about some default values. Do you happen to know the resource in Open-Shell that defines the default paddings? I'm trying to add some overrides and I want it to be precise as possible, then I will change it from there. I've looked around the source code and haven't stumbled upon it yet.

I don't really know, but my guess is it uses the empty skin defaults.
I found these files in ClassicStartMenuDLL in Classic-Shell-master 4.3.1

SkinDescription.txt

; Empty skin - all properties are defaults, except:

About=#7100
AboutIcon=103
Main_padding=2,2,2,2
Main_no_icons2=1
Main_new_selection=#FFBB00
Main_new_text_color=#000000
Main_new_arrow_color=#000000
Submenu_padding=2,2,2,2
Submenu_separator_text_padding=3,4,4,4,100%
Submenu_separator_icon_padding=6,3,3,3,100%
Submenu_separator_split_text_padding=3,4,4,4,100%
Submenu_separator_split_icon_padding=6,3,3,3,100%
Submenu_new_selection=#FFBB00
Submenu_new_text_color=#000000
Submenu_new_arrow_color=#000000
Main2_padding=4,2,2,2
Main2_text_padding=3,4,4,4,100%
Main2_new_selection=#FFBB00
Main2_new_text_color=#000000
Main2_new_arrow_color=#000000
More_bitmap=none

SkinDescription7.txt

; Empty skin - all properties are defaults, except:

About=#7100
AboutIcon=103
Main_padding=2,2,4,2
Main_new_selection=#FFBB00
Main_new_text_color=#000000
Main_new_arrow_color=#000000
Submenu_new_selection=#FFBB00
Submenu_new_text_color=#000000
Submenu_new_arrow_color=#000000
Programs_new_selection=#FFBB00
Programs_new_text_color=#000000
Main2_new_selection=#FFBB00
Main2_new_text_color=#000000
Main2_new_arrow_color=#000000
Main2_padding=2,2,2,2
Main_search_padding=2,2,2,2
Main_jump_padding=2,2,2,2
Main_text_padding=1,3,8,4
Main_no_icons2=1
Shutdown_padding=5,5,5,5
Shutdown_text_padding=5,4,8,5
Shutdown_icon_padding=4,3,-2,3
Submenu_padding=2,2,2,2
Submenu_separator_text_padding=3,4,4,4
List_separator_text_padding=3,0,0,0
List_separator_icon_padding=4,3,4,3
List_separator_split_text_padding=3,0,0,0
List_separator_split_icon_padding=4,3,4,3
Main_search_indent=8
More_bitmap=none

Hmm, there's that apps.ico folder you were mentioning to someone about updating in ClassicStartMenuDLL folder as well.

Apps folder.png

Update I give up looking for default values. Not skilled to read code. Maybe defaults back to Windows default code?

#26

Hey, speaking of default stuff, there are default arrow bitmaps in there as well for 100 and 144 dpi.
Did you ask if 125 dpi arrows can be updated/included along with the code to use them?
Those internal ones work better(more functions)for the search arrow than a skinned one.

They do look funny in the picture, but I guess there have to be reversed ones for the right to left reading start menus.

Internal default arrow sizes.png
bonzibudd · Author
#27

Interesting.
I guess those defaults must be determined by Windows, because that's the only reference of defaults I found. It shouldn't be too hard to replicate, though. I am specifically looking for the defaults for submenu text and icons. I'll just assume the icon padding is the same on the left and right, and adjust the text padding to match.
And yeah, that Apps.ico file. I was going to try to replace it myself, but I couldn't find the blue "tiles" image as a standalone image, I would like to find that specifically so I could replicate it with the new folder image.
That's a strange configuration for those default arrows, maybe it would be good to have more DPIs for those. I wonder why that layout is different than what the skins use?

#28

There was one guy "meetHG" back on CSM who made Omni-Pic.skin7, that was like you,
where he cut out everything to the bare minimum relying on the built-in defaults, then added what was needed.
What would happen if you deleted all the paddings and see what happens? Maybe 0?

I guess the arrows bitmaps are the same as the search bitmap, where the first box of pixel dimensions are assigned to something, then the next area goes to something else, and so on. Makes me wonder did Ivo make code for search bitmap and arrows bitmap, or is it pulled from Windows?
I've seen bitmaps and large png like this in Windows, for example, "stream" where there is the reflection diagonal bars, animated busy icons, Xs, buttons,
all laid out in an all in one image. Must be something behind the madness.

#29

I see how those menu_arrows.bmp get some of the directions in the SkinManager.cpp file:

static POINT g_ArrowSizes96[]=
{
{0,3}, // insert left
{3,6}, // middle size
{6,9}, // insert right
{10,14}, // right arrow
{14,18}, // left arrow
{18,25}, // down arrow
{25,7}, // total size
};

static POINT g_ArrowSizes144[]=
{
{0,4}, // insert left
{3,8}, // middle size
{7,11}, // insert right
{12,18}, // right arrow
{18,24}, // left arrow
{24,35}, // down arrow
{35,11}, // total size

Menu arrows 96 size.png

And this from SkinManager.h file

const POINT *GetArrowsBitmapSizes( void ) const; // insert left, middle size, insert right, right arrow, left arrow, down arrow, total size

I bet there's code somewhere else.
I see stuff like "GetArrowsBitmapSizes" in MenuPaint.cpp file, but I think it's getting those from Windows.

bonzibudd · Author
#30

Question about the classic styles and their corresponding options.
If I take a look at the "Metro.skin" file, I can see the options list and the options assigned to each style. However, there seems to be another factor at play for determining which options are enabled by default for each style individually. For example, the Classic1 style follows the text provided for "USER_IMAGE" in that it is not enabled by default. However, the Classic2 variant enables the option regardless.
So my question is this: Am I missing something obvious that determines a different default between the two styles, or is there something coded in Open-Shell that changes some default options?

#31

I think it's a bug.
What we did way back was instead of calling it OPTION USER_IMAGE=#7014,0
we just used a different name like OPTION AVATAR=#7014,0
It seemed to work.

bonzibudd · Author
#32

Ok, I see. I'll probably change those going forward then.

bonzibudd · Author
#33

A bit of a sanity check.
When you set a classic style menu to 120DPI, which section of the bitmap does the search magnifier use?
I just tested this with a couple skins, and for some reason they seem to be using the high DPI (bottom row) section of the bitmap instead of the standard. 7 styles continue to use the 96DPI section as expected. Can you confirm this?

#34

I didn't notice any difference between classic and 7 styles.
120 dpi just uses 16x16 pixels row in most cases, not the 20x20 row.
And what's worse is depending on the type and size of the main font,
the bottom row may or may not trigger for 144dpi. Very frustrating.

Speaking of that, I just finished making the 120 dpi separate bitmap for Win7Like skin.
Notice all I can do is squeeze as much as I can into 16 pixels.
I then do the same for the 144 bitmap.

By using 3 bitmaps, if the size wanders back and forth, it won't drop to 96 dpi image.

Magnifier squeeze.png

Would be nice to have a dedicated 3 row, or even a 4 row to cover 192 dpi.

bonzibudd · Author
#35

I just checked out WIN7LIKE revB. Looks very nice, I like the extra space in between the main2 items, and it looks like you added many improvements overall. The new glass selector looks much better than I thought was easily obtainable. This is really nitpicking, but I noticed some things you might want to look into if you're interested in making additional changes:

  • Search bitmap looks too close to the right, maybe due to another change
  • Submenu text is slightly higher within padding than original (seems to be better height than before though)
  • "Reduced size" small selectors could have even less space in between, same with submenu
  • List separators have thinner font in Win7 original, don't know if that is intentional
  • Very specific, but Win7 split selectors actually have an added "state" compared to Open-Shell. The "Main" selector is probably as good as it can be, but it looks like you might be able to change the list selectors to behave closer to Win7
  • Non-glass selectors, especially "new" selectors look darker compared to Win7, the Aero theme is the same way

You've probably already considered some of this, but I thought it wouldn't hurt to throw some stuff out anyway. I'm also in a very OCD mode, so that's something.

#36

HI

That's why it's called WIN7LIKE.
If someone wants a more original look with the exact Win7 code, then switch to Startisback.

The main reason I upgraded to rev B was to make the 2 column selector padding bigger,
as well as adding a larger button option when small icons are picked. That turned out to be a chore,
having to add invisible pixel lines to qty 14 selectors and add more paddings to balance them.

What I did was make a lot of screenshots of the original win7 start menu, and got some from the net to compare.
Then I decided to leave most as is, or change if it's way off, or change because I don't like what they did.

I found that the real Win7 is not perfect.
The search box and shutdown button get vertically huge at 150% size,
along with a shortened h separator. The program's tree selector is one pixel less icon padding on top.
The programs arrow icon is higher than the text.
There is a difference with selectors size and text font size on the jump and search views,
depending on if aero or basic theme is picked.

I thought I got the search box the same at least for the 100% size?
It will wander with large display sizes, which could be fixed with separate bitmaps and figures for larger sizes.
I skipped.

On some skins, I made separate text and icon paddings for each 100,125,150% size. Not this skin.

New selectors and regular blue selectors. I was using Ivos. I noticed there was a difference.
The white surrounding line is brighter on real win7.
It comes down to any transparent png used in Win7 is premultiplied so,
unless every image is converted to straight they will never look the same because Ivo's start menu does not use premultiplied images.
I actually like Ivo's because they look smoother. Left them as is.

I did not like the way the submenu icons are pushed to the left on the real Win7. I made even on rev B.
On the old WIN7LIKE skin, I had to make the submenu icon background very wide as it had to accommodate 125 size icons.

Yes, it looks like the submenu text padding is 1 pixel higher.

Who knows when Ivo will shut down the forum.
Hey, I still have all the way to revision Z to go to get it right!

I guess I have that OCD zone sometimes too, but most of the time and more these days,
I don't sweat the little things as much anymore.

Oh yeah, there was one problem I encountered that took a day to figure out. Now that's OCD. :)
Whenever [SMALL_ICONS] was picked the Programs_button vertical size would get bigger.
No amount of logic would shrink the size. Adjusting Programs_button_text_padding
and Programs_button_new_text_padding sizes made no difference. Tearing my hair out.
Finally, all I had to do was add "Programs_button_icon_padding=3,3,2,3,100%" under [SMALL_ICONS].

Bye.

#37

Hello
Oh shoot, I logged off here last night, but have been logged on on Github all this time. Oh well.

I misunderstood the search magnifier bitmap. Yes, it is more right.
Not sure if it's worth changing as there is no way to make the search box X selector look as the real win7.

Looks like I was wrong to use Win7 screenshots found on the net as a good reference.
I never saved the site links. Most Win7 screenshots were deleted on my Win10 desktop.
The ones I saw had the search view split selector text with small grey and blue fonts.
Here's a different site I found today with the grey small font:

Looks like it's an earlier version build from the blue one I saw days ago.

I don't think there is a way to have a large font on search with one color,
and different colored size font on jump view.
Also, in real Win7 there is no selector used in that search view location.
In CSM/OSM it will show as a big honking selector.
If you prove me wrong that the search and jump view font and h separator can be different,
I will add it as an option. Good luck with that. :)

I will add the correct looking list selector in the revB skin some time today. Made it already.
I won't even change the version as hardly anybody is downloading the revB skin. :(

#38

I decided to rename the skin with revB1 and now B2 because oh what the hay, I replaced the new selectors with the original on programs,
small main, and the white submenu locations. The large main MS selector image needs conversion. I always have trouble with the two programs I use to convert from premultiplied to straight, for they are not accurate.
I gave up on that way as they got too yellow bright.
For the large main selector, I just copied from the screenshot,
and pasted on a separate selector because it has a different gradient inside.

I did try pushing the search magnifier and X 3 pixels to the left. Not good looking. Disabled it.

bonzibudd · Author
#39

Good work! Looks closer and closer to the original Win7 menu.
I have always thought that the search and jump views were defined strangely in Open-Shell, but as far as I can tell, there's no way to differentiate the font/separator. There is also the "Search arrow" which is nonexistent in Win7, but it should probably be kept since it shows users that they can expand that list.
Submenu looks better as well.
Hopefully people can be made aware of this revision, it's weird because the Classic Shell forum still often shows a high number of online users. Personally, I would make a separate post announcing the skin, so people would know where to look.

#40

In most cases, I would just kill off the earlier skin by replacing it with the new version.
This one is different. It's around 4 years old, and I'm sure the download link has been shared
by people and a few sites. I think the download link would be dead after replacing it.
I'll just let it die a natural death when the forum shuts down.

When Ivo said the site would shut down in a year, I rushed porting skins.
Now that the deadline has passed and the site is still up, I slowed down making skins.
I have a wip skin folder on my desktop for over 6 months waiting for me to finish the skin.
Without something pushing a deadline date, it will take another 6 months to finish it. :)

There is a downside to having the submenu text put lower,
where "y" comes too close to the bottom border of the selector.
I think that is why Ivo has default text paddings with the bottom almost always one
or two pixels larger than the top padding.

I've always found the "List_separator_split" area confusing to use.
I thought it could be used for different fonts and other settings for the search view compared to the jump view.
I think it's only useful when having a special image for "More_bitmap= "
There has to be some hidden potential there that we are not seeing.

Just like that "Programs_button_icon_padding"
The program's button arrow is called an icon, but it's not a multi image icon.
Not knowing that icon_padding could be used, I would add a ton of invisible padding
to multiple icon arrow images to make the visual "All Programs" text be in the middle of the start menu.
It can all be done with just text! Dang.

I've started upgrading the combo monstrosity skin.
As it was made very wrong for the sake of Win 10 color-saturated looks,
I may not be carrying over everything from the WIN7LIKE B2 skin.

So anyway, what's happening with your two skins?
Is there more code that can be added to Open-Shell to get the looks you want?

A few months back I tried Startisback to see what's new.
They still have grey added to the menu to desaturate the Metro color.
They have light and dark modes, as well as acrylic looks.
I'm not checking out the latest insider Win 10 builds,
and don't know if acrylic large blur noisy look is going away or not,
but I sure wish it was available in Open_Shell.

bonzibudd · Author
#41

Acrylic would definitely be nice to have. Especially now, where it seems that Aero glass may be on its last legs with those flashes in the submenu.
 
In general, I think there's a lot that could be done to "clean up" Open-Shell and its functionality, whether it be default preferences, or cleaning up existing options.
 
One of the main things I think could be improved is color tints on transparent surfaces, and the "Override glass" option. I think the color system in general is fine overall, especially now that "Immersive" colors can be used to effectively take advantage of light and dark mode with blending. The main problem is when transparent images actually "bleed" the system glass color if they have transparency, which can make a simple color change become a two-step process, going between the skin's options and the override color setting.
 
So I think that code should be added to detect if tint1 is in use by a background, and disable any possible use of the system glass color. In this case, the override glass option may need to be changed, maybe it should be disabled completely if the skin specifies a tint1 color. Maybe this is possible in some way that I haven't found out?

#42

What about the way the menu color bleed goes away when the menu glass opacity is set to 0.

I wonder if there is a way that the coders could put an internal skin option that overrides the default 50% menu glass opacity to near 0%?
So this would stop the color bleed on that specific skin only.
The bitmaps for that skin would have to have a higher opacity value to look the same.
What would 0% opacity look like? - Nothing with blur or with a less opaque menu?

As a simpler test that would affect all skins,
maybe you could ask one of the coders to just build a .exe just for you with "SettingsUI.cpp" file modified
from
const int DEFAULT_GLASS_OPACITY=50; // 50%

to
const int DEFAULT_GLASS_OPACITY=1; // 1%

or
const int DEFAULT_GLASS_OPACITY=0; // 0%

If it works out that it has no color bleed, maybe then coders can then put the correct code as an internal skin option in the 2 skin manager files,
and of course, set the SettingsUI.cpp back to 50%.

bonzibudd · Author
#43

That's an idea. However I think that the opacity should theoretically have nothing to do with the bleed, if we want the skin to solely rely on the supplied color and not the glass color. If it's the best solution, it could be worked with, but I also think that it could cause unnecessary confusion for anyone who doesn't understand the specific usecase.

One thing I haven't tried is just supplying the bitmap background, but not a mask image. I don't know if that would remove the bleed, but I'm sure you have experience with that. If that works, it may be a better solution for my Fluent-Metro skins, which only use static colors for the dark and light modes.

#44

Go for it. You have to try at least once.
From my experience, though it just did the same bleeding thing.
I'm sure way back someone tried using either 24-bit or 32-bit pattern image as well.
It never went away. It must always be mixing with the system color and the color assigned in the skin.

I want to try the opacity thing myself,
but looking at the Classic Shell "BUILDME" file, I don't have all those programs:

You need the following tools:
Visual Studio 2008
Windows SDK 7.1
HTML Help Workshop
WiX 3.7
It is possible to convert the projects to newer versions of Visual Studio and newer SDKs.
Newer versions of WiX will probably work fine.

bonzibudd · Author
#45
{545BB351-A309-4F20-8FF9-8EDED253117A}.png

I've been digging around the source code, looks like I found those default paddings. I never realized the text padding was so small.

It looks like there may also be some references to the color bleed, but I can't tell if it's just referring to the glass color itself. Even if that bleed is not specified, I still imagine that it would be possible to remove it under appropriate circumstances.

When I saw that "s_SkinError[1024];" I thought that must be the error skin that shows up when
skin bitmaps don't match the size, number or missing a bitmap.

But that error skin looks like the "No Skin" skin.

So you may be right that the numbers match the true default.

That small text padding will look fine with a default solid color selector without icons showing.

Look what happens when there are no icons showing with a skinned selector that has
big borders along with invisible borders.

On some skins I made, that had the no icons option added for CSM 4.3.0,
I added higher text padding,
but most other skins I left text padding as is,
assuming most users will use default icon sizes.
Looks like I may have dropped the ball on this one.
Then again the more changes are made,
the more those higher text paddings affect other options like larger fonts, where they have to be reduced.

small text padding.png
#47

If I look at the Smoked Glass .skin,
Ivo put notes about default paddings.
You can see where he overrode:

; Main_text_padding - extra padding on the left/top/right/bottom of the text in the main menu
; The default is 1,2,8,2
Main_text_padding=1,0,8,3,100%

so it makes the "y" fit inside the selector:

Smoked Glass.png

He so smart.

Now look what happens on my combo .skin7 with an even bigger selector border on main
relying on the real default for 7 style:

No good.png

Not so good :)

Looks like there always has to be a compromise to fit every situation.
To have text centered or offset to fit.
For my combo.skin7 I will definitely have to add more pixels.

bonzibudd · Author
#48

Going back to the list section and the different fonts for search/jump.

It seems like it is, in fact possible. I started by setting the "More" bitmap to resource 1, interestingly setting it to 0 does not work as described in the Metro skin. From what I can tell, it doesn't add a button at all.

When the split section started working, I noticed the text padding reverted to something else, so I had to create text for List_separator_split_text_padding. Which seemed to work. The different sized text did seem to apply at that point. So the last thing to figure out would be making the bitmap section invisible, but keeping the "split" status. I don't remember if I could apply padding to that section, I haven't tried it. Since the search arrow uses icon padding, maybe the more bitmap uses arrow padding, guessing from its location. It could also be set to a 1px wide image so the separator is barely offset.

To go even further, the separator selection could be made invisible. However something I didn't notice before is that the selector in Windows does actually appear when using arrow keys. Not sure if that exact behavior could be possible with Open-Shell right now, so it would probably be safer to use a standard selector.

#49

Excellent work.
I hate to say this, but I may have tried some of these things before, but forgot about them!

Here is with a freaky arrow that sort of works:

arrow operation.png

I changed to this text with an invisible image:

; LIST SECTION
List_text_padding=0,0,4,0,100%
List_separator_font="Segoe UI",bold,-9
List_separator_text_padding=3,0,0,0,100%
List_separator_icon_padding=6,3,3,3,100%
List_arrow_padding=5,7,100%

List_separator_text_color=$StartSelectionSecondaryText,$StartSelectionPrimaryText

List_separator_split_font="Segoe UI",bold,-12

List_separator_split_text_padding=3,2,0,3,100%
List_separator_split_icon_padding=6,3,3,3,100%

List_separator_split_text_color=#FF0000,#FF0000
List_separator_split_arrow_padding=-1,-1,0%

List_separator=#FF0000
List_separator_mask=6
List_separator_tint1=#FF0000
List_separator_slices_X=8,6,8

List_separator_split=#00FF00
List_separator_split_mask=6
List_separator_split_tint1=#00FF00
List_separator_split_slices_X=8,6,8

and got this:

list more options.png

I will put your info into the WIN7Like revB3 .skin7. :)

other
I've given myself a headache trying to figure out the text padding.
I'll eventually get there.
Looking at Windows 7 real start menu, the glass selector size seems to scale at 50% instead of Ivo's 100%.
The other selector's scale at almost nothing.
As usual, I will have to make compromises again.

Thanks again for helping me.

#50

By using an invisible split selector and this text:

;for jump view
List_split_selection=$SystemAccentDark2|$StartSelectionBackground
List_split_selection_mask=29
List_split_selection_tint1=$StartPrimaryText
List_split_selection_slices_X=2,2,2,2,2,2
List_split_selection_slices_Y=2,2,2

;for search view
List_separator_split_selection_mask=35
List_separator_splitt_selection_tint1=#000000
List_separator_split_selection_slices_X=2,2,2,2,2,2
List_separator_split_selection_slices_Y=2,2,2

it gets close enough to mimic the 7 search view look.

#51

Hmm, the more I play with the "more" settings,
the more I don't think it works very well.

If I use real Windows7 os search view,
all the blue text has big font 15.

If I hover over the blue Documents text, the underline shows, and clicking that opens its search folder.

You are right that there is a visible selector button that shows up
with the arrow keys, or clicking the separator line area and waiting for one second for it to show.

On my WIN7LIKE revB3.skin7 on Windows7 os CSM4.3.1
with the similar type of text I had mentioned on the above posts:

The large blue text is on some like Docs, Music, Pictures.
Other blue text headers are smaller?

There is no blue underline. Can expand to show more finds in the search view though.

An added grey colored separator image:
List_separator_split=101
List_separator_split_slices_X=8,6,8
that I added does not show itself on Win7 os. It reverts to the darker list view which is
List_separator=98
List_separator_slices_X=8,6,8

On windows10 it shows correctly the grey separator in search view.
Why isn't it consistent on diff operating systems?

The biggest problem is one can't see the more results folder. It can only expand downwards.
I was thinking of putting the "more" look as an option, but if it does not function correctly,
I might skip it altogether. Maybe you found out more info? :)

By the way,
I have the same issue even without adding any extra text but just changing to "More_bitmap=0"
Years ago, It used to show the same magnifier image as the "See more results" at the bottom of the search view.
Now nothing. What have we missed?

Offhand the only skinner I remember using a more bitmap was meetHG with his Omni-Pic skin.
I may have experimented way back on one or two skins, but don't know if I ever released them.

#52

I went back and changed the skin text and it has a visible split button with a magnifier bitmap.
Here is a multi-image overlayed screenshot on Windows 10:

More test on Win10.png

Notice the split mag image shows even when it can't access the see more results folder.
So it's giving a wrong visual cue.

Also, there is no blue underline when hovering over the Documents, so that cue is missing.

So, I'm going to shelve this search view option and go back to working on other things.

Switching back to your new skins.
Are you going to give the separator your trademark shadow effect?
This picture is yours with a faint shadow added:

Shadow separator.png
bonzibudd · Author
#53

Yeah, I've been playing around with the shadows. Unfortunately I had to add another tint color designated to $StartPrimaryText to the main bitmap in order to make the colors match Win10 better. I might be able to come up with some creative solution, maybe using the vertical separator or an emblem image.

Something else I've been considering about the new skin is what the border should look like around the half-glass-half-immersive style.

In most instances in Windows 7 for example, the selectors go relatively close to the edge of the opaque section, and the rest of the padding was designated to the glassy border on the outsides. This gave it a similar look to the glass borders on standard windows. If I wanted to follow the padding of the Windows 10 window borders though, I'm out of luck since it only has one pixel. Buttons go right out to the edge, and even overlap in scrollable areas of modern apps.

The Win10 start menu does the scroll overlap thing, but only giving the menu 1px of padding seems like a bad idea. So now I have to decide if I want to bring back the thick glassy border, or make a 1-2px border with plenty of padding on the inside.

Screenshot 2020-12-16 233827.png Screenshot 2020-12-16 234030.png

The fullglass style is pretty straight forward since there isn't an opaque section, so I'll keep that pretty similar to before. I am currently leaning towards increased padding inside of the opaque section.

Some more things I've been working on: Better selections on immersive background, curved buttons (Probably not all, but including search box, shutdown), and a 3rd transparency level. I might play around with the jump/search separators as well, and see if it's actually possible to get the correct behavior.

bonzibudd · Author
#54

Well, just had a dumb realization. It turns out that I actually added the tint color #000000, not $StartPrimaryText. So I can actually still add the shadow. I've also decided to add a thin border around the outside for now, and keep the padding relatively similar.

#55

If you eventually run out of tint colors, there are pattern masks that you can use.
Sometimes I used text set to a color, but most of the time I used a 16x16 bitmap as the reference color that tiles itself.
I used both methods (opaque 0 to 255) or (255 with transparency)on the masks.
Ivo mentioned somewhere that one type of mask slows down the drawing of the start menu, but I never noticed.

Yes, it's so easy for us humans to forget that we did or not change something,
or think we are using the latest modded test skin only to find what we changed, was saved to the old skin save location.

Here is an error I found on probably all the many millions of Windows 7 computers out there.
The start menu glass selector corners have the wrong horizontal and vertical slices.
It's not that noticeable with 100% size, but quite noticeable at 150%.
They should have used 5 pixels to stop the corners from stretching.
It appears the designers used 3 pixels instead, so the other 2 corner pixels stretch:

slicing error150 real Win7.png

I'm sure every skin I've made has a number of human errors in them as well.
That's the good thing with GitHub. Every change is documented.

Other stuff.
Grandmaster, I have a question.

Have you ever seen the native Windows 7 start menu have a shadow on the right and even onto the taskbar?

Mine doesn't. I am wondering if I should put an option in the WIN7LIKE skins to disable the shadow. What happens is,
on Win7, with Classic Shell shadow enabled,
it shows always on top of the taskbar.

I've come across this shadow anomaly once in a while on Win10.
If I open the menu again, it's gone.

Shadow on taskbar.png

Woops, the 7 screenshot is still on the Win7 drive.
The one above is another capture on Win10. :) Fixed

Here is a screenshot of the Windows 7 system.
I decided to put an option in the skin to have the main menu shadow turned off by default,
while still leaving the submenu shadow as is.

Menu shadow on Windows 7.png

There is one thing that bugs me right to this day.
CSM can't access the full-color intensity that the real Win7 start menu has.
No matter if 255 max color mask is used on any CSM bitmap, it won't display it in glass mode.
The CSM menus are always darker. Turning up the glass color amount option to 100% helps a little bit only.
Windows 10 does the same but not as bad.

bonzibudd · Author
#58

Yeah, I did notice the shadow difference. I don't think I've ever seen a main menu shadow on the Win7 menu, but there might have been some tweaks to enable it under certain circumstances.

One thing that I did realize is that Windows Vista actually does have a more similar shadow, I'm not sure if it has the same Taskbar behavior as well. It seems weird that they would remove it. I think that the shadow can help with how the border looks on some low-contrast backgrounds, but it's not really much of an issue on Win7/Win7like which have a pronounced border anyways.

About the glass colorization, I have found that I am able to match the taskbar color about 90% of the time. I usually use the "Bliss" wallpaper as a good reference. I suspect the problem is more apparent on Win7 because it has a more complicated blending of different Aero colors to get a more saturated look, even on very low opacities.

Screenshot 2021-01-09 135136.png

I have found the aero colors on Win10 to be much more linear, it seems like more standard alpha opacity. I think Open-Shell probably acts more like this, and coincidentally matches with Win10 more closely. However it still seems like whatever algorithm finds that color can't match the saturation completely.

#59

Win 10 probably is more linear.
Still, as I found out with CSM/OSM, if one makes the skin color mask set up for the Auto accent color,
it can be made to match the taskbar color,
but then one has to make another more intense color mask to match up to the taskbar when using the taskbar and menu override colors.
Seems to be an Auto color accent the most consistent.
Using a Windows Custom color or a theme is the worst for matching.
Example: Windows 7 Hawaii theme on Win10.

Taskbar missmatch.png

Back to Windows 7.
I was looking to see if I can make the Win7like skins look better with at least correct opacity.
I can see the menu bitmaps in Windows 7 resources. They are not usable even when unpremultiplied and stitched back together.
They must alter the bitmaps opacity and brightness with code. They must use some exponential or logarithmic
function, just as Ivo made a function for glass skins that don't have system glass.
The alpha opacity gets darker in a non-linear way to black.
I searched and searched for color masks.
Nothing.
I think Windows 7 makes the whole color mask just from code that avoids anything approaching white.
Well, that got me nowhere.:)
There is nothing that can duplicate the real Win7 look.
With sliders that control any combination of color intensity, color saturation, tint, and brightness.
I'm about to give up and just do some visual inspection in the next week and then upload the skins when time allows.

bonzibudd · Author
#60

Ok, I finally came back to this thread, and I have a question about the scrollbar for the Windows 7 style menu.

On my Windows 10 skin, there are options for both a transparent and opaque left-hand side, and while the opaque scrollbar works fine, the transparent one has the wrong opacity when glass is disabled. It looks like the metro theme might have a similar issue, but I can't tell because it seems to be much more opaque in general.
Screenshot 2021-02-12 210614.png

I was wondering if that is something that could be improved without messing up the glass mode. I have found that the background of the programs pane is not included in the scrollbar, so I need to add it into the scrollbar bitmaps themselves. I think that might be related, but I'm not sure how it would work differently with glass disabled.

#61

We all find out sooner or later that the scrollbar is a separate entity.

With transparency, it is transparent to the desktop behind the menu.
If you ever used the original edge browser, you would notice the same
transparent effect on the favorites scrollbar.

@randm, who made the Tenified103 skin lets us know too:

When a strong glass color opaque scrollbar amount is set for a nice look with the tree background color,
it all goes out of balance when the user changes to a lower "Glass opacity" value.
The scrollbar color stays the same. I think it happens on a semi-transparent scrollbar as well but I could be wrong.

Yeah, that "no glass" option/Win8 scenario is a headache.
Have to make a separate option with different color/opacity amounts for the scrollbar.
If the tree programs background used "transparent", then the color/opacities have to use hex values in an option as well.

Speaking of the scrollbar,
I was planning on releasing the WIN7LIKE skin with a transparent gradient/color mask gradient scrollbar option
to match the full glass menu option. It didn't go well.
The scroll/color mask background images were close to 3 times the height of the menu image.
I was thinking it's going to match perfectly to the menu gradient surrounding it.
Much like how Ivo used "transparent" for programs background.
Boy was I wrong. Wish I could show you but that skin got overwritten.
When the thumb is at the very top or bottom of travel, it almost matches as it is displaying just one scroll background.
When the thumb is at the center position, now two visible scroll backgrounds above and below have the gradients
half the size. It looked super goofy when the thumb was in motion with the top and bottom backgrounds compressing
and expanding opposite of each other. So I never included it. I even tried opaque with glass color and no gradients.
It never looked good as the steady scroll background would go lighter, darker, and invisible to the menu gradient.
It had to be so bright to overcome those faults, it wasn't worth it.

Other
Son of a gun. I uploaded the wrong WIN7LIKE skins on the CSM forum.
A day before uploading, I noticed the original orange shield shutdown update icon is offset,
up more on the original Windows7 menu,
but my blue box update image looks too high with icon padding offset and I set it back to normal just for the blue box option.
I uploaded the day-old skins instead by mistake, but only noticed weeks later when there was an update.
I'm just going to leave it as is unless I find something else that's wrong.
Maybe no one would ever use that option anyway.
I noticed the update image behavior works differently than the real Win7 menu.
The real orange icon disappears, but switching to the CSM menu, the update image still shows for awhile. Odd.

bonzibudd · Author
#62

Ok, that background opacity does make sense. I don't know if I'm going to change anything yet, but I might end up just forcing the opaque scrollbar that I have already created, which uses the immersive colors.

In the meantime, I'm going to keep working on these background bitmaps. The automatic light-dark colors are fun to play with, but it takes a lot of trial and error to get them to blend right in both modes.
Screenshot 2021-02-14 090257.png

And of course, there might be more changes to the color down the road, so I'll have to see what looks the best overall.

bonzibudd · Author
#63

Hi @CTVCAM8

It's been a minute, I hope you are doing well. I feel like I have gotten to a good place with my Fluent-Metro/Immersive skinning stuff, but I had a question about one thing, which is how you do stuff with Premultiplied alpha. If it's not too complicated, I would like to see how you took the resources from Windows and converted them into something OSM could use accurately, like in the WIN7LIKE skin.

#64

Hi bonzibudd.
Yep, been a while. Got my first covid shot a month ago. :)

About converting premultiplied back to straight.
As I didn't know about it at the start, I would just brighten up the premultiplied image and increase the alpha somewhat.
It never matched correctly. Even when I found out about the two programs below,
the converted images were much better looking but the alpha values still did not look correct when I pieced the start menu images together.
It's as though Windows 7 has some other extra calculation that goes on besides the premultiplied images.
It has to be tied to the color intensity slider that changes color intensity plus alpha values.
Low alpha values like around 3/255 appear to look a higher value when on Win7. Maybe they introduce a slight logarithmic function in the slider?

Here's a converted image that I had high hopes for but never used, as it is too transparent at the bottom and top.
I had to mix and modify the low alpha values to get them to look acceptable. Guess it's called fudging them.

Real WIN 7  bitmaps converted to straight for csm.png

Anyway,
the only programs that I used to change premultiplied back to straight were

1.Blender:

Difficult to navigate through it all just to demultiply a static image.
In fact, I don't remember how anymore. It did a good job though.

2.Create Aero msstyles compatible PNGs:

It's very easy to use, but it sometimes leaves a few wrong colored pixels that need to be touched up.

You probably have to set up an account now to download anything from Deviant.
Win 10 will block the program after downloading or block it from installing as it sees it as a possible security risk.
You have to force Win 10 to let it pass.

Other.
Feels like the Classic Shell site is getting ready to die.
It very hard to get on-site to upload ported skins, or even just to view the pages. It's a shame.
Now I remember I said I would upload your skins on to CSM site.
Will your skins even have compatibility anymore on CSM V4.3.1 if the skins have more auto display sizes [120_DPI], etc text in the skin files?
They are either going to disregard [120_DPI] (which is good) or force the settings to use 120dpi always (not good)?

#65

I've probably mentioned this somewhere before about the low alpha values when using glass not looking the same on CSM/OSM.
I'll just throw it out there one more time.

There is one other thing which Ivo has happen when there is no glass third party available on a skin that uses glass opacity.
That is where CSM forces the menu to use an alpha opacity with a nonlinear alpha curve, where the alpha levels get more opaque at the lower end.

Maybe Ivo just tapped into Windows code that has different nonlinear values and picked the strongest value for his effect.
A big guess here, maybe coders can look at CSM code and see if it can be tailored to match a Win7 menu while still using glass opacity,
along with some skinning text to enable it?

bonzibudd · Author
#66

Very interesting, thanks for that info. I will try that Aero Compatible program, and I might even try to mess around with Blender to see if I can vaguely replicate the appearance. I feel like there has to be some way to balance out the alpha opacity better, but I'll still be happy if I can at least match the accuracy of WIN7LIKE, as it's probably better than good enough for most scenarios. I was planning on experimenting with some longhorn/vista stuff, so maybe I will start there.

As for Classic shell, it's a shame to see that the site isn't holding up well. It has been pretty slow to load for me in the past few months, but I do think it's nice that it has stayed up for so long after the program was discontinued. For Fluent-Metro, if you wanted to upload that, it might be best to just have a link to the GitHub releases, brief description, etc, with a disclaimer that it only works with Windows 10 and Open-Shell 4.4.160 and above. I'm not currently planning on making a version for Classic shell 4.3.1, but if I ever make one, that could be added later on as a one-off. The main differences would be the DPI stuff and the system colors (they would need to be changed to the app background/text color to display properly).

#67

I don't see a way to send a private message. Oh well.

To tell you the truth, I've had this text file on my desktop for many months waiting for you to come out with your final skin versions.
I guess there never will be a final version. :)

Maybe some of the options are not in your newer versions. You could update what I wrote below and I will paste that on the CSM forum,
or you could make your own version and I will just paste yours along with a couple of pictures of your skins.

ps Don't make really large picture file sizes or the site won't display them anymore.

[[[[[[[[[[[[--------------------------------------------------------------------------------------------------------------------------

Hello
I'm pasting someone else's 7 style and classic style start menu skin links here,
just to show people still enjoy modifying Ivo's Metro.skins to their own taste.
I believe it is not compatible with the last CSM version 4.3.1, so it has to use a minimum Open-Shell version ????? to work correctly.

It's called Fluent-Metro. by @bonzibudd

@bonzibudd has carried over as many Windows 10 looks as possible(dark, light, accent color modes),
with many options for alternative looks as well. Has got to be the most different skin options ever! :)
This menu has a unique look to it by using different size fonts and paddings for different areas.
Even the icon frames are smaller so they hide behind large square Metro app icons that don't need it.
All arrows, pins, and "All Programs" icons have correct size images for 100%/125%/150% display sizes.
Will even scale automatically.
A few distinctive looks are "Win10 shutdown button" option that just shows the shutdown image with hidden text,
and "Transparent scrollbar" used with the transparent main menu option.
And lastly, a Win10 style main menu shadow vertical separator option, for the expanded left pane two-tone look.

It's a good idea to check @bonzibudd's link for new releases of the skins(on the right side of the main page):

or

Here are a couple of his menu display pictures below.

----------------------------------------------------------------------------------------------------------------------------]]]]]]]]]]]

bonzibudd · Author

Looks good for the most part, I did make some changes since those earlier releases though (and the classic styles), so I'll do a new description.

You can make some further changes if something doesn't seem clear. Also, for the images, you might need to download and re-upload them, because I don't know if Classic Shell forum will accept the GitQ link.


Hello
I'm pasting someone else's 7 style and classic style start menu skin links here,
just to show people still enjoy modifying Ivo's Metro.skins to their own taste.
It is not fully compatible with the last CSM version 4.3.1, so it has to use a minimum Open-Shell version 4.4.160 to work correctly.

It's called Fluent-Metro. by @bonzibudd

@bonzibudd has carried over as many Windows 10 looks as possible(dark, light, accent color modes),
with many options for alternative looks as well. Has got to be the most different skin options ever! :)
This menu has a unique look to it by using different size fonts and paddings for different areas.
Even the icon frames are smaller so they hide behind large square Metro app icons that don't need it.
All arrows, pins, and "All Programs" icons have correct size images for 100%/125%/150%/200% display sizes.
Will even scale automatically.
A few distinctive looks are "Modern shutdown button" option that just shows the shutdown image with hidden text,
and many other button and selector styles to choose from.
And lastly, a Win10 style main menu shadow vertical separator option, for the expanded left pane two-tone look.

Along with the Windows 7 style menu, there is also a Classic w/ two columns variant with tiles.
To use the tiles properly, you can apply the XML file provided in the release after you copy the skins.
You can also further customize the items for the tiles under "Customize Start Menu."

It's a good idea to check @bonzibudd's link for new releases of the skins(on the right side of the main page):

Here are a couple of his menu display pictures below.

Win7 Style:
Fluent-Metro_1.png

Classic(with tiles):
Fluent-Metro_2.png

Well, that was a good 20 minutes to upload.
Phew and Yay. Done. :)

It makes me wonder if people are copying the whole CSM website to their computers for safekeeping.
Much like how it was done on Open Shell GitHub. I'm guilty of that too in 2018,
I used HTTrack Website Copier when the CSM site bandwidth was still high. Took about half a day.
The software isn't that great as any picture, .skin, .skin7. zip,.rar
gets saved in a different name and has to renamed to the original .name to work.

The website is over 5GB and I'm sure when a few people do this along with the regular big-name bot crawlers,
the bandwidth goes way down to practically dial-up speed.

#70

Hi.
I read that you are learning to code.
I found this very old article by Ivo:

He explains how some of the code works in his very early Vista, Win7 Classic Shell versions.

I looked on sourceforge.net for any newer open-source code but found nothing.
I think because other coders were taking his code and selling his start menu under new names.